Wednesday, May 28, 2014
The Best EVER Banana Cake
I know, the title says "cake" and here I am showing a picture of cupcakes. Here's the story:
Several months ago at a family gathering I saw a cute, white frosted cake. No one had yet partaken, and so I watched closely for someone to take the first slice... not wanting to be overly-eager to dig into this cake I was having good vibes about.
Finally, when I took a bite... mmmm!! I KNEW that this was a recipe I absolutely HAD to track down (just like I did with THIS one). I've made it several times, and it doesn't disappoint! A few weeks ago, I was assigned to bring a dessert to a dinner party. I was so busy that I handed the recipe over to my husband to make. He did, and holy cow, now he's a celebrity cook among that dinner group! Of course, he got all the recognition :)!
I've had this on my checklist to share here for a while, and finally decided to make the cake recipe into cupcakes. I loved them as cupcakes, but honestly, even more as a cake. The ratio of frosting to cake is PERFECT! As cupcakes, I haven't quite perfected it. So, definitely make it as a cake... your taste buds will party. Then, try cupcakes later too, if you want.
Ingredients:
1 1/2 cups bananas, ripe, mashed
2 teaspoons lemon juice
3 cups flour
1 1/2 teaspoons baking soda
1/4 teaspoon salt
3/4 cup butter, softened
2 1/8 cups sugar
3 large eggs
2 teaspoons vanilla
1 1/2 cups buttermilk
Frosting:
1/2 cup butter, softened
1 (8 oz package cream cheese)
1 teaspoon vanilla
3 1/2 cups powdered sugar
Garnish:
walnuts, or whoppers
Directions:
1. Preheat oven to 275 degrees.
2. Grease and flour a 9X13 pan OR two round pans.
3. In a small bowl, mix mashed bananas with lemon juice, set aside.
4. In a medium bowl, whisk flour, baking soda and salt; set aside.
5. In a large bowl, mix butter and sugar til light and fluffy.
6. Beat in eggs, one at a time, then stir in vanilla
7. Beat in the flour mixture alternately with the buttermilk.
8. Stir in banana mixture.
9. Pour batter into prepared pan, or pans. Bake for 1 hour or until done.
10. Remove from oven and place directly in freezer for 45 minutes (makes the cake very moist).
Make frosting
1. Cream butter and cream cheese until smooth.
2. Beat in vanilla (1 tsp)
3. Add powdered sugar. Beat on ow speed until combined, then on high speed until frosting is smooth.
4. Spread on cooled cake.
5. Garnish :)
It's DEFINITELY worth making!
XO,
Nancy
Friday, May 23, 2014
The BEST Art Supplies for Kids
We mamas are in big anticipating the coming of SUMMER VACATION, eh? Sometimes we feel excitement to just chill and relax, and other times a little dread pulses through the veins. I mean dread in all good ways... we love our kiddos like no one else, yet that fear of keeping them from turning to technology addicted zombies bites at me.
I asked my kids what they wanted to spend their summer doing, and their quick answer was: lots of swimming, and lots of art. I couldn't be more pleased with their answer since we live in Las Vegas, and it is H-O-T. We. Will. Swim. Lots.
...And art... kids are the BEST natural artist that exist. I would LOVE to keep creative little artists forever. Plus, art is my total and 100% favorite way to "play" with my kids. When working on art projects, if we relax, we can have a grand time with the kiddos.
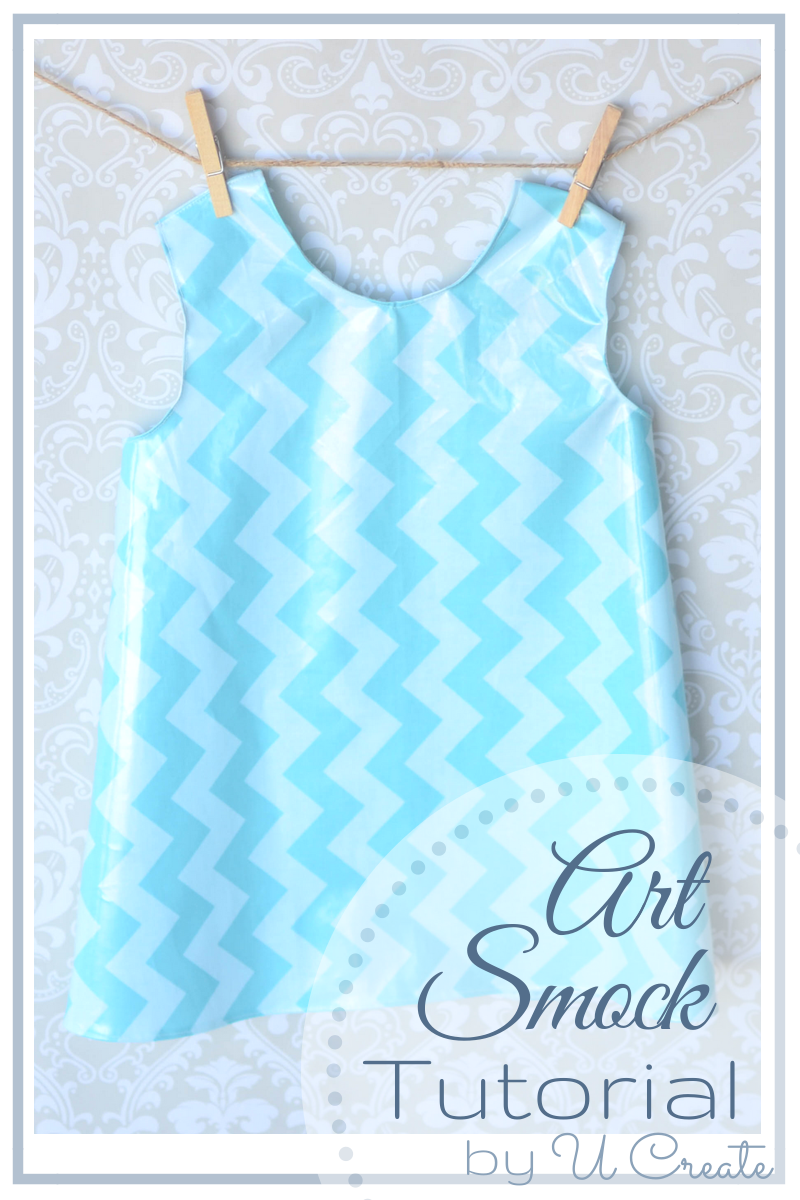
I'm hoping to carve out some time to make these adorable at smocks by Becky from Ucreate!
Here's my list of great art supplies to entice budding artists to spend less time looking at the screen, and more time with a smock on. I'm acquiring them a little at a time... thank goodness for the craft store coupons!!
(*** Means a definite essential)
1. Oil pastels ***
2. Colored pencils (twistable are great!) ***
3. Pip squeak markers ***
4. Skinny markers
5. Sharpies
6. collage materials (buttons, googly eyes, etc)
7. Chalk
8. Sidewalk chalk
9. yarn
10. Scissors, fun shaped ones too ***
11.Glue ***
12. Glue gun (teach older kids to use)
13. Embroidery floss
14. Stockmar crayons
15. Mini paint rollers
16. Colored masking tape
17. Colored duct tape
18. Tempera paint
19. Watercolor crayons
20. Liquid watercolor paint, or watercolor tubes
20. Watercolor cakes (regular stuff) ***
21. Variety of paintbrushes ***
22. Glitter glue
23. Shaving cream
24. Pipe cleaners ***
25. Printmaking tools (vegetables, sponges, bubble wrap)
26. Finger paints
27. Contact paper (for stained glass activities)
28. Stapler
29. Regular pencils ***
30. Regular pens
31. Sketch books ***
32. Beads
33. Paper plates
34. Clay ***
35. Salt dough
36. Play dough
37. Construction paper ***
38. Card stock
39. Heavy weight white sulphite paper
40. Poster board (cut smaller)
41. Fabric and felt scraps
42. Brown contractor's paper from Lowe's (instead of butcher paper) ***
43. Marshmallows (sculptures)
44. Glitter
45. Toothpicks
46. Wooden shapes (to paint or make magnets)
47. Window markers
48. Mat board remnants (from frame shop)
49. Rainbow loom and bands
50. Perler beads (or melty beads)
Pull out a few of these materials ever day and watch the kids go to town with their creations... better yet, "go to town" with them!
Oh all the possibilities:
suncatchers, postcards, printing with kitchen supplies, magnets, embroidery, illustrating a book, marble rolling, shaving cream on the window, painting cookies with edible paint, paper mache, puppets, dyed pasta, melted crayon shapes, and so much more!
Happy summer preparations!!
XO,
Nancy
Wednesday, May 14, 2014
10 Life Lessons I learned from doing an Iron Man
So my workout partner found this awesome blog Pass the Fresh
and they were having this challenge.....
I would have two weeks to complete 2.4 miles swimming, 112 miles of biking and 26.2 miles of running/walking. My husband and daughters have competed in several triathlons while I cheered them on from the sidelines. I was always too afraid of trying because I have never learned how to swim. In the past two years, I have taught myself how to back float (sort of). I would bike and run with the girls in training but swimming was not my thing. When my friend suggested that we should do this challenge, I was at a point that I was willing to "TRI". My first thought was there is no way I can do the full Iron Man but maybe I could do the Sprint or the Olympic. I was so amazed as I began the two weeks, how many Life Lessons I learned from this experience.
Don't let FEAR stop you from achieving your dreams. For so long, I have been afraid of water. I have missed out on many fun opportunities because of being afraid. My dad use to always tell me "Face the Fear and do it anyway". I think that is what I did. I saw the pool and I was afraid but I jumped in and did it anyway. AND it took me a long time but I did it!! I learned that sometimes I am not only afraid of not accomplishing something great but sometimes I am also afraid of accomplishing something great. Hope that makes senses. We sometimes set up ourselves up for failure just because we are afraid of trying!!!
ALWAYS have a friend who will ENCOURAGE YOU. This journey would have been incredible hard had I not had my workout partner with me through this journey. When I reached the Olympic distance (.93 mile swim, 25 mile bike and 6.2 mile run/walk) I realized that I did more than I thought I could. When my friend said that she had accomplished more I to wanted to do more. It wasn't a jealousy or competitive issue it was a "I want to do that too". She encouraged me when I felt like I couldn't go anymore. She cheered me on when I accomplished something great. She told me I could do one more lap or one more mile. In life we all need good friends and those who ENCOURAGE US!!
YOU CAN DO MORE THAN
YOU THINK YOU CAN!!!!!!
On the first Saturday of the challenge, I went to the pool to swim some laps. My thinking felt strong and I wanted to do as many laps as I could with the 50 minutes I had before the pool closed. When it was time to leave I was shocked that I had swam 14 laps. In life we settle, don't accomplish or don't finish our goals because We think we CAN'T! This lesson taught me that I really can do more than I think I can.
There is OPPOSITION in ALL GOALS and DREAMS!!!! Okay maybe that isn't really true but it sure felt so too me with this challenge. I have to admit I didn't start out very strong the first week. I got news that my Aunt had passed away and decided to travel to Arizona with my sister and my 4 kids for the funeral. We were leaving on Thursday and would return Saturday. That would be two and half days that I would not be able to exercise the majority of the day, if at all. The hotels we were staying at had pools so I decided I would swim laps each day and also brought my running shoes so I could run to be able to work on my goal. We arrived Thursday night to find that the pool was under construction and that I was too tired to run. I got up the next morning late but decided I would still go out and run a mile or so. We left after the funeral and arrived at the next hotel to find it was out of order for cleaning! Are you kidding? The last day of the competition I still had to bike 26 miles. I decided I would wake up at 6:00 and head to our gym that is at our Public Swimming Pool and bike til the kids had to go to school. (BTW you can get more miles per time biking on a stationary bike than on a road bike or mountain bike.) When I got there the bikes didn't work. I felt almost hopeless because I knew there was no way I could bike 26 miles pulling my kids in the trailer. The most I had done doing that was 10 miles in a day. HA HA see Life Lesson #3. I got home before my husband left for work and he was able to hook up my bike to his brother's bike trainer so I could finish my miles. It was an all day event while still taking care of my little ones.
Size doesn't matter!!! For most of my life I have been overweight. Still active but still overweight. I really thought that in order do anything athletic, especially a Triathlon, you had to be a size 4 or look like an athlete. I am grateful for learning this lesson that although being healthy and thinner is one of my goals that SIZE should not stop you from trying to reach your dreams and goals! It may take you longer than the size 4 girl next to you in the gym but she is just trying to reach her dreams and goals too!! Encourage her on as well.
Being a mom and having young children is not an excuse. I just had a baby seven months ago and in the past I have always used my kids as an excuse. I am too tired to exercise I was up with the baby all night. I can't reach that dream because I have to take care of my children's needs. I can't say this enough.... It is so important to take care of yourself so that you can take care of your children. It's ok to take a break and do something you love. You will be a better mom for it. I will be eternally grateful for my oldest daughter who watched my little ones so I could exercise. I am also so grateful that my kids exercised right along with me. They would go on walks and bike rides with me to get my miles in. My sweet little 3 year old biked so much with me that one day I went to buckle her in the bike trailer and she screamed "NO MOM, PLEASE MOM DON'T MAKE ME RIDE IN THE TRAILER AGAIN!!! (112 MILES is a lot of miles to ride in bike trailer.)
DON'T PROCRASTINATE. Just like the lessons I learned that there is Opposition in all things, I learned that procrastination gets you no where. I had two full weeks to accomplish the iron man and unfortunately, I left half of it to do in three days. Every muscle and body part hurt. The first day, I divided each event miles and figured out how much I would have to do each day to accomplish this goal. Had I stuck with each days goal (6.5 laps of swimming, 9.3 miles of biking and 1.87 miles of running/walking) it would have been a much easier task then trying to bike 26 miles the last day.
When it hurts, there are things that can help. Ibuprofen can ease the pain. A hot bath releases some aches and pains. Resting is important. Keeping hydrated is the key. Telling others what you are doing can keep you energized. (I don't like to share lot on face book, but it was fun to hear people encouraging me when I felt like I was never going to finish)
Hard Work never hurt anyone. (ESPECIALLY ME) These two weeks of working out was hard work for me. It was hard to keep myself motivated to do the iron man as well as keep up with the day to day stuff. I was never perfect at it. I was so glad that I did something that felt hard for me. It was good to push me farther than I ever thought possible.
Get up and Get Moving!!! Stop sitting on the sidelines of life and get up and LIVE. Whether it is accomplishing a health goal, saving money for the dream house, searching for the dream job, living life to the fullest, GET UP and DO IT!!! Life is too short to not accomplish something you have dreamed of doing. It may take time, hard work, others, a lot of pain, stopping the excuses, but YOU CAN DO IT!!! You can really can!!!
I did it!!! In two weeks, I accomplished the FULL IRON MAN! It was a great feeling. It was great to accomplish a goal. One step at a time. One box at a time!!
Achieve your goals!!!
Jan
Thursday, May 8, 2014
Poptastic Teacher Appreciation Gift
Teacher appreciation week. Hmmm. I always wonder what my kids' teachers would really like. Heaven knows they deserve some extra BIG appreciation!
One day I was walking through Cost Plus World Market and couldn't contain my hands after I saw this Yard of Popcorn! I HAD to plop it it my cart. Seriously. My fingers gave me no choice.
Literally, the package spoke to me. I knew it was just meant to be.... Poptastic Teachers. Yes cheesy (or corny), but it'll make the teachers chuckle, give them a good supply of popcorn, and make my kids feel really cool (that's what matters most, right?)
If you need a super quick teacher appreciation gift, here you go. Just save to your computer and print. I'll admit, I just wish I was a graphic design expert... one day hopefully I'll have some skills. For now, this will have to do...
If you don't want to buy the whole yard of popcorn, you could make one of the million amazing popcorn recipes out there. OR give the teacher a bucket of movie theater popcorn with a gift certificate to GO to the movie!
Need more teacher appreciation ideas? Check out all of Jan's amazing ideas HERE, HERE , and HERE.
XO,
Nancy
Tuesday, May 6, 2014
School Projects with Salt Dough
So we have had two major school assignment with our girls this month and wanted to share the best ever Salt Dough Recipe I found from Rainy Day Mum.
Here are the girl's project....
We had to make a Habitat for a Dolphin we used Polymer Clay and Salt Dough. Here is another great idea for Polymer Clay from Nancy. We used the Salt Dough for the coral reef and added animals and seaweed with the polymer clay. She was awarded the "Most Colorful" habitat!!!
The float had to have four major landmarks. We chose Mount Rushmore, Crazy Horse, Sioux Falls, and Mitchell's Corn Palace. After learning about these landmarks I want to go visit South Dakota. Check out these sites for more information about these landmarks.
Here are the girl's project....
We had to make a Habitat for a Dolphin we used Polymer Clay and Salt Dough. Here is another great idea for Polymer Clay from Nancy. We used the Salt Dough for the coral reef and added animals and seaweed with the polymer clay. She was awarded the "Most Colorful" habitat!!!
We also had to make a State Float. My daughter selected South Dakota.
So when you have a school project and need a Salt Dough recipe I recommend Rainy Day Mum.
Happy Creating!
Jan
Thursday, May 1, 2014
25 SIMPLE Homemade Mother's Day Gifts
I collected these ideas ESPECIALLY for teenage girls to make for their moms. The 14-15 year old girls in my church wanted to make a gift for Mother's Day, and it's my job to find one for them.... which is a bit tricky because there are so many adorable crafts for little kids, and a zillion beautiful and complicated crafts for adults.
The crafts the made the cut for this list are 1) Super cute, but not little kid-ish 2) inexpensive 3) able to be completed in an hour or so.
Here's what I've found, still deciding which one to do....
1.
These particular clothes pin magnets are on Etsy in the Earth Cookie Creations shop , but are quick, easy, and adorable to make.
2.
Personalized, anthro-inspired key chain with by Morena from Craft Unleashed .
3.
Mother's Day Charm Necklace by Crystal from Craft Unleashed.
4.
Maybe a journal??
5.
Awesome Pastry Cloth by Cami from Tidbits .
Learn all about pastry cloths HERE !
6.
7.
DIY No Slip Headbands by Lauralee from Potlucks on the Porch
8.
Dollar Store Cake Stand by Chickabug
9.
Button Bookmarks by I Heart Naptime
10.
Dollar Store Hot Pads {made cute}by The 36th Avenue
11.
With Mod Melts make paper clips, charms or book marks
See THIS tutorial by 52 Mantels
{***Wow Mod Melts are a must try sometime!!}
12.
Jewelry Organizer from I Heart Naptime
13.
Year Long Gift in a Frame {Free Download} by Eighteen25
*Fabulous Idea!
14.
Recipe Holder by Lil Luna
15.
Coffee Filter Wreath by Lil Luna
16.
DIY Mother's Day Mugs by Gimme Some Oven
17.
Bird Nest Necklaces by Sarah Ortega
18.
Stenciled Tea Towels by No. 2 Pencil
19.
Striped Glass Jars by The Crafted Sparrow
20.
8.
Dollar Store Cake Stand by Chickabug
9.
Button Bookmarks by I Heart Naptime
10.
Dollar Store Hot Pads {made cute}by The 36th Avenue
11.
With Mod Melts make paper clips, charms or book marks
See THIS tutorial by 52 Mantels
{***Wow Mod Melts are a must try sometime!!}
12.
Jewelry Organizer from I Heart Naptime
13.
Year Long Gift in a Frame {Free Download} by Eighteen25
*Fabulous Idea!
14.
15.
Coffee Filter Wreath by Lil Luna
16.
DIY Mother's Day Mugs by Gimme Some Oven
17.
Bird Nest Necklaces by Sarah Ortega
18.
Stenciled Tea Towels by No. 2 Pencil
19.
Striped Glass Jars by The Crafted Sparrow
20.
30 Minute Homemade Jam by The Baker Upstairs
21.
Coconut & Lime Sugar Scrub from Our Best Bites
22.
Soda Can Candy Boquet by Miss Copy Cat
23.
{Washable} Glittered Wooden Spoons by Something Turquoise
24.
Mother's Day Tin Can Treats by Our Best Bites
25.
"Real-like" Silk Flower Arrangements by How Does She
XO,
Nancy
Subscribe to:
Posts (Atom)