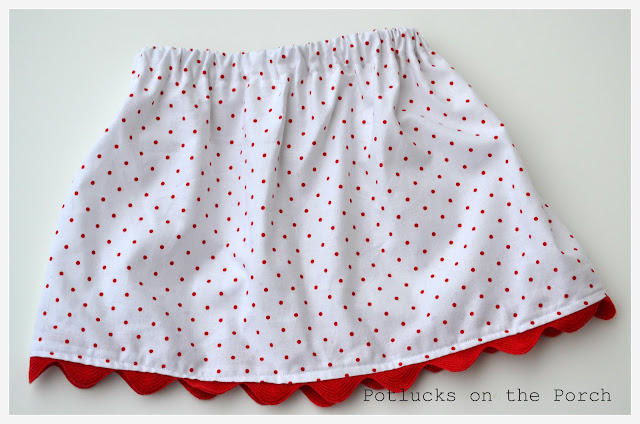
As I was in my favorite fabric store a few days ago, I spotted this polka dotted fabric. I'm a total sucker for polka dots. Love. Them.
Then I saw some jumbo ric rac. Love that too!! Thoughts of valentines day, and vintage pictures swam around my head. These skirts just appeared in my brain. So, I bought the stuff and made them for my twin girls (yes, they are fraternal). Then I made a little ric rac flower pin to accent for a little valentine outfit. But, really they could work for any time.
The thing is, these skirts are so simple. I'll give you the formula, and you can make them for ANY size.
(Ric rac is not essential either).
They're so quick, sew up a few in no time!
Fun for church, or just hanging out...
If you want to make your own..........
Materials:
Fabric, 3/4" elastic, ric rac, sewing machine, pins, coordinating thread, iron
See below to calculate how much of each is needed.
For example: if the waist is 20 inches, and the length is 12" to the knee (or desired length)...
Cut fabric 40" X 14 1/4" (For little girls and babies, one piece of fabric is easy to cut. More fabric can be added and sewn in 2 places instead of 1, if there is not enough fabric for 1 continual piece...ie 2 rectangles).
Cut elastic 19"
Cut ric rac 40"
First, serge or zigzag the top and bottom of the fabric.
Then, with right sides together (so the pretty part is on the inside), pin the side or sides
Sew a 1/2 inch seam down the side or sides
This next step can vary depending on the width of the elastic. I made these skirts with 3/4" elastic, but you can use any size elastic. The only thing you would change with this pattern is adding that much more when you cut the fabric, and folding it that much longer here.
After the 1/2" fold, fold one more time the width of the elastic plus 1/2 inch. So, if the elastic were 1 inch, then I would fold it 1 1/2 inch more. Since my elastic is 3/4", I folded it 1 1/4". Make sure to press.
After pulling the elastic through, obviously sew the remainder of the casing shut.
Then pin on the ric rac. Make sure to pin it on the right side of the skirt!

All done!
Happy sewing!~Nancy


